
കൂവ കൃഷി ചെയ്യുമ്പോൾ ഇങ്ങനെയൊന്ന് ചെയ്തുനോക്കൂ.!! അടുക്കളയിലെ ഈ വേസ്റ്റ് മാത്രം മതി | Arrowroot farming
Arrowroot farming
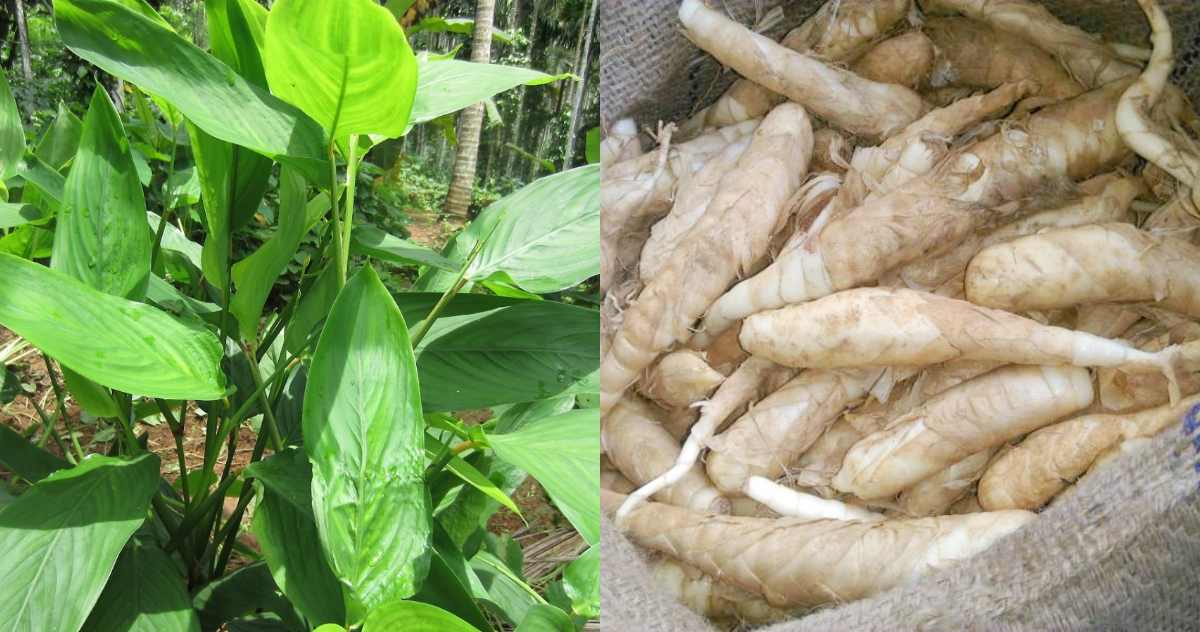
Arrowroot farming: ധാരാളം ഔഷധഗുണങ്ങളുള്ള ഒരു സസ്യമാണ് കൂവ. അതുകൊണ്ടുതന്നെ പണ്ടുകാലം തൊട്ട് തന്നെ നമ്മുടെയെല്ലാം വീടുകളിൽ കൂവ കൃഷി ചെയ്യുന്ന രീതി ഉണ്ടായിരുന്നു. കൃത്യമായ പരിചരണം നൽകുകയാണെങ്കിൽ നല്ല രീതിയിൽ വിളവെടുപ്പ് ലഭിക്കുന്ന ഒരു സസ്യമാണ് കൂവ. അത് ഉപയോഗിച്ച് പൊടിയും, കൂവ ഉപയോഗിച്ചുള്ള മറ്റു പല വിഭവങ്ങളും
തയ്യാറാക്കി ഉപയോഗിക്കാറുണ്ട്. എന്നാൽ നല്ല രീതിയിൽ കൂവ വിളവ് ലഭിക്കാനായി ചെയ്യേണ്ട കാര്യങ്ങൾ എന്തെല്ലാമാണെന്ന് വിശദമായി മനസ്സിലാക്കാം. കൂവ കൃഷി ചെയ്യുമ്പോൾ മണ്ണ് നല്ലതുപോലെ ഇളക്കി മറിച്ചാണ് കിഴങ്ങ് നട്ടു കൊടുക്കേണ്ടത്. തണുപ്പുകാലത്തേക്ക് വിളവ് ലഭിക്കുന്ന രീതിയിലാണ് കൂവയുടെ കൃഷി രീതി. പ്രത്യേകിച്ച് തിരുവാതിര സമയത്താണ് കൂവ ഉപയോഗിച്ചുള്ള പായസവും മറ്റും കൂടുതലായും തയ്യാറാക്കി ഉപയോഗിക്കാറുള്ളത്. നല്ല രീതിയിൽ വെളിച്ചവും
വെള്ളവും തുടക്കത്തിൽ നൽകിയാൽ മാത്രമേ ചെടിക്ക് വളർച്ച ലഭിക്കുകയുള്ളൂ. മൂന്നുമാസത്തിൽ ഒരു തവണയെങ്കിലും ചെടിക്ക് ചാണകപ്പൊടിയോ അതുപോലുള്ള മറ്റു വളങ്ങളോ നൽകേണ്ടത് അത്യാവശ്യമാണ്. അതല്ല ചാണകപ്പൊടി അല്ലെങ്കിൽ വള പൊടി പോലുള്ള വളങ്ങൾ ഇട്ടുകൊടുക്കാൻ സാധിക്കുന്നില്ല എങ്കിൽ വീട്ടിൽ തന്നെ തയ്യാറാക്കി എടുക്കുന്ന വളക്കൂട്ട് ചെടിക്ക് നൽകാവുന്നതാണ്. അതിനായി അടുക്കളയിൽ നിന്നും ലഭിക്കുന്ന പച്ചക്കറി,പഴങ്ങളുടെ വേസ്റ്റ്, മുട്ടത്തോട്,
ഉള്ളിയുടെ തൊലി എന്നിവയെല്ലാം ഉപയോഗപ്പെടുത്താവുന്നതാണ്. ഇവയെല്ലാം വെള്ളത്തിൽ ഇട്ടുവച്ച് കുറഞ്ഞത് നാലു മുതൽ അഞ്ചു ദിവസം വരെ റസ്റ്റ് ചെയ്യാനായി വെക്കണം. എല്ലാ ചേരുവകളും നല്ല രീതിയിൽ വെള്ളത്തിൽ കിടന്ന് പുളിച്ച് വന്നുകഴിഞ്ഞാൽ വെള്ളം ഉപയോഗിച്ച് ഡയല്യൂട്ട് ചെയ്ത് ചെടിക്ക് ചുവട്ടിലായി ഒഴിച്ചു കൊടുക്കാം. ഈയൊരു വളക്കൂട്ട് കൂവയ്ക്ക് മാത്രമല്ല മറ്റ് കിഴങ്ങ് വർഗ്ഗങ്ങൾ കൃഷി ചെയ്യുമ്പോഴും ഉപയോഗപ്പെടുത്താവുന്ന ഒരു മികച്ച വളക്കൂട്ടാണ്. കൂടുതൽ വിശദമായി മനസ്സിലാക്കാൻ വീഡിയോ കാണാവുന്നതാണ്.
Here are some simple and effective Arrowroot (Koova) farming tips for healthy growth and a good yield:
🌱 1. Ideal Climate & Soil
- Arrowroot grows well in warm, humid climates.
- Prefers loamy, well-drained soil rich in organic matter.
- Soil pH should ideally be 5.5–7.
🌿 2. Land Preparation
- Plough the soil 2–3 times to make it soft.
- Add plenty of cow dung/compost before planting.
- Raised beds help prevent waterlogging.
🌾 3. Planting Tips
- Propagated using rhizome cuttings (healthy, disease-free pieces).
- Plant rhizomes 4–6 cm deep with 1–1.5 ft spacing.
- Best planting seasons: May–June or early Monsoon.
💧 4. Watering
- Water lightly every 3–4 days during early growth.
- Maintain consistent moisture, but avoid waterlogging.
- Mulching with leaves or straw helps retain moisture.
🌼 5. Fertilizer Tips
- Add cow dung slurry (kunjivellam) every 20 days.
- You can also mix wood ash to boost rhizome formation.
- Avoid heavy chemical fertilizers; arrowroot grows well organically.
🐛 6. Pest & Disease Control
- Arrowroot is generally pest-resistant.
- If mealybugs or leaf pests appear:
- Spray neem oil (5 ml/litre) weekly.
- Use soap water (mild) for quick control.
- Prevent rot by ensuring good drainage.
⏳ 7. Harvesting
- Ready for harvest in 8–10 months.
- Rhizomes should feel thick and firm when fully matured.
💡 Extra Tips
- Keep surrounding area weed-free for better growth.
- Rotate crops yearly to avoid soil diseases.
- Store harvested rhizomes in a cool, dry place.
If you want, I can also share a complete arrowroot organic fertilizer schedule, step-by-step planting guide, or high-yield variety suggestions!